Troubleshooting Guide: Windows 10 Search is Not Working
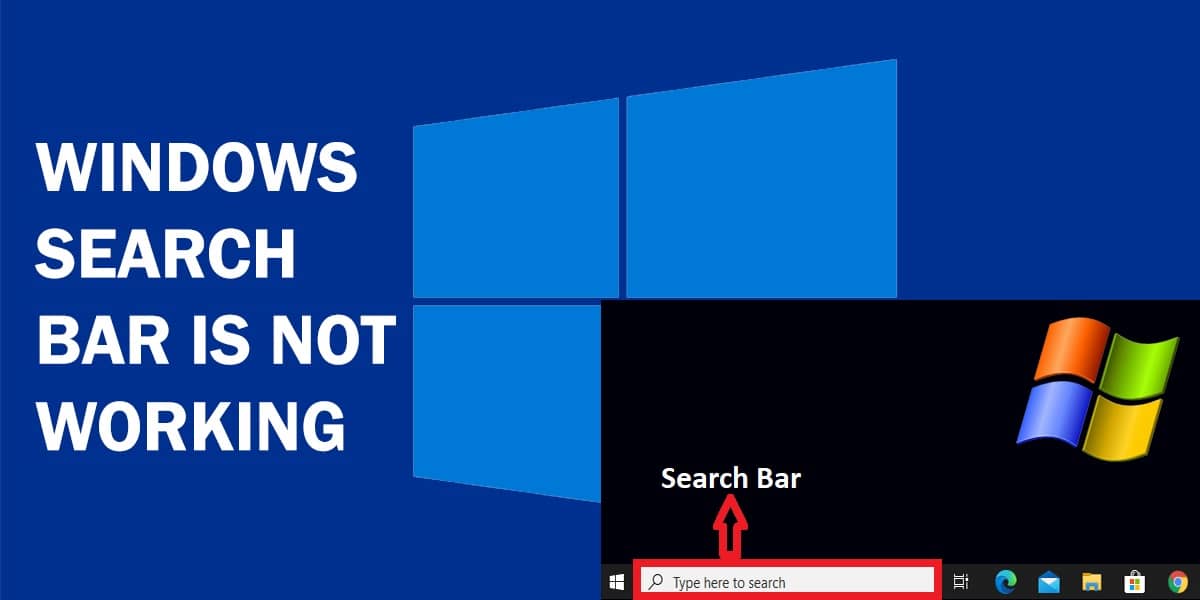
Like all digital features, there may be instances when you face issues with the Windows search bar as well, especially when Windows 10 search is not working. The Windows 10 search bar or start menu search is one of the most useful features of Windows 10, conveniently located just beside the familiar Start menu button.
What is Windows Search?
Old Windows users know how to find something by going through the menu, but the Windows 10 search bar makes it easier than before. If you ignored it beforehand, you are missing out on making your Windows experience faster and more efficient.
One nifty shortcut the Windows search bar has for you is simply opening the Start menu and start typing – the results automatically come up! Windows Search makes it simple to find and search for files, apps, and all sorts of odds and ends without wasting time digging deep in your PC.
Why Does Windows 10 Search Stop Work?
One of the main reasons why the Windows 10 search service is not working might be due to a recent Windows update. Check to see if Microsoft has released a fix for it. If not, then you need to delete that troublesome update. If still the issue persists, then below are some of the solutions to troubleshoot the Windows 10 search bar!
Troubleshooting Windows 10 Search Service
Getting fast search results relies on indexing the data and other files on your PC. You can use the troubleshooter for Windows Search and Indexing when your Windows 10 search is not working. properly due to indexing issues.
- To run the troubleshooter, do the following:
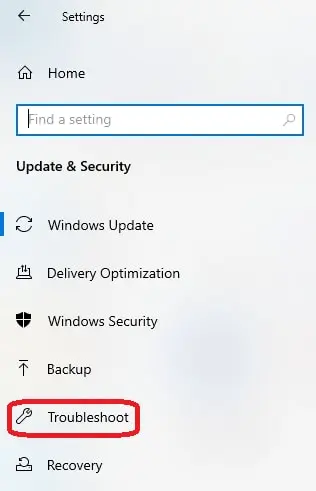
- Open the Start menu and click Settings.
- Go to Update & Security, and select Troubleshoot from the menu on the left.
- In the section “Find and fix other problems”, choose “Search and Indexing”. Click the button labeled “Run the troubleshooter”.
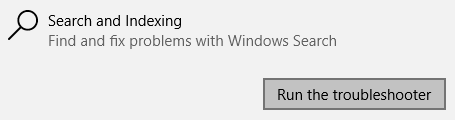
- The troubleshooting wizard automatically detects and fixes any present Windows 10 search bar problems.
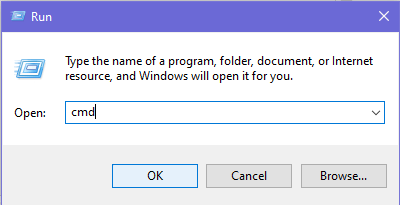
If you cannot access Setting, use the command prompt to launch the troubleshooter by following these steps:
- Use the Windows logo key + R keys shortcut to open Run. Enter the word “cmd” in the box. Click OK.
- In command prompt, run the following command:
msdt.exe -ep WindowsHelp id SearchDiagnostic
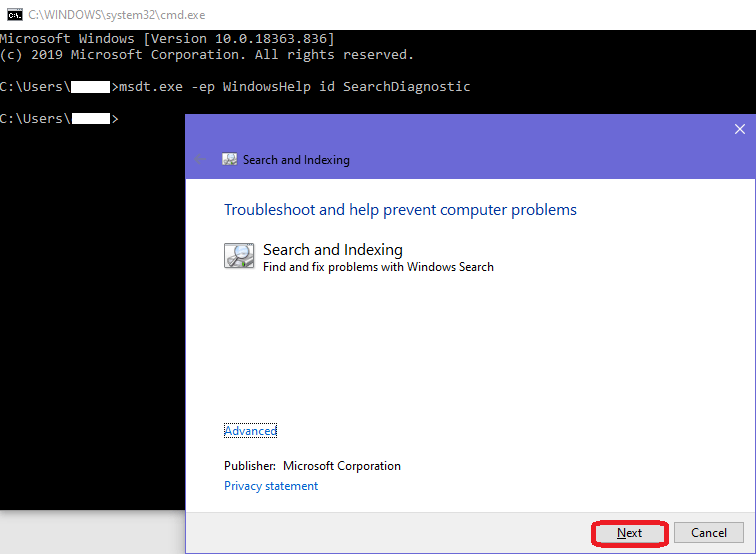
- This launches the troubleshooter. Click Next and follow along with the screens. Reboot afterward if needed.
Related: Troubleshooting Guide: Laptop Touchpad Not Working
End the Windows 10 Search Bar Process
The Windows 10 Search process runs the searching and indexing, and by restarting it you can fix possible issues with the search bar. Here’s how:
- Launch the Task Manager. There are two methods to open the Task Manager.
- Press the Windows logo key + X and select Task Manager from the menu, or
- Press the Ctrl+Alt+Del keys. Your screen switches to a blank one with a list of functions to choose from. Click on Task Manager from the options.
- When the Task Manager opens, switch to the Details tab. Find “SearchUI.exe”, right-click on it, and choose “End task”. Select “End process” when prompted.
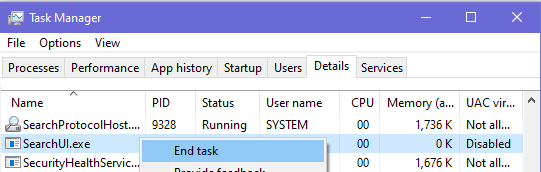
- When you perform a search next time, the “SearchUI.exe” process automatically starts again. Reboot your PC if it does not restart.
Interesting Read: How To Speed Up Computer Performance Windows 10
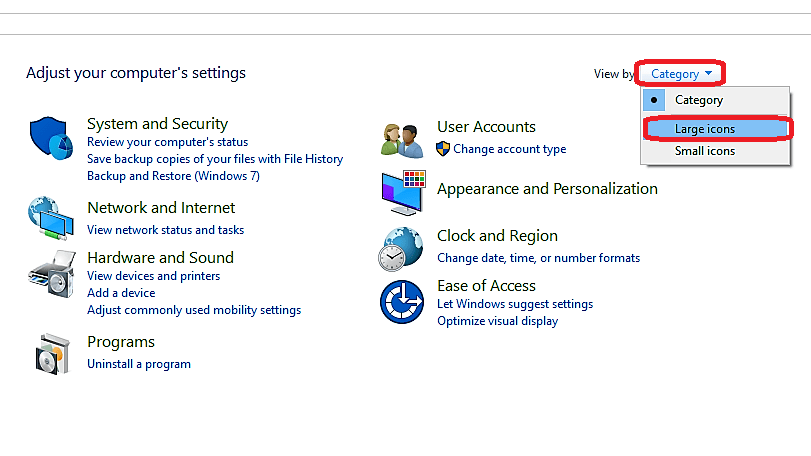
Rebuild the Windows 10 Search Bar Index
There’s a likelihood that your start menu search is not working due to corruption in the search indexing files. Rebuilding the search index may help. Here’s how to go about it:
- Go to Control Panel.
- In Control Panel, open the “View by” drop-down menu at the top-right of the screen and select “Large icons”.
- Select “Indexing Options”. In the window that opens, click on the button labeled “Advanced”.
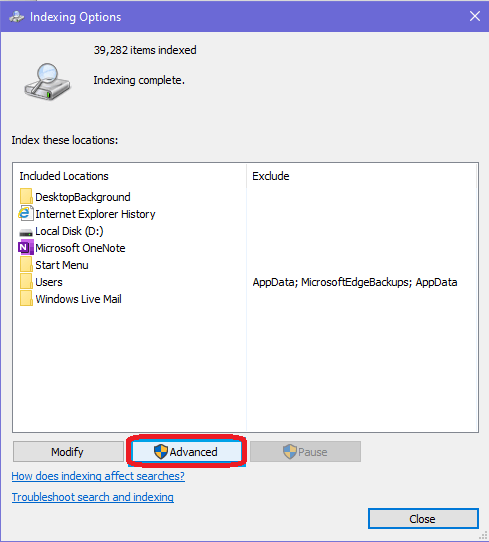
- In the next window, click the “Rebuild” button in the Troubleshooting section.
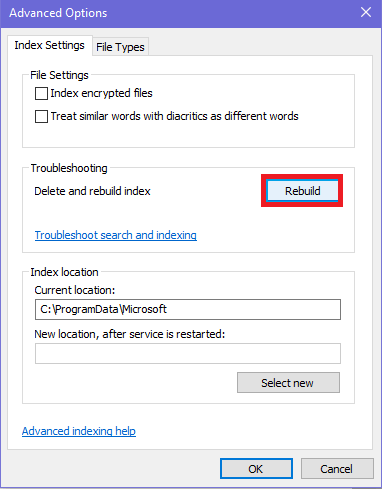
- Select OK on the prompt that pops up, and wait until the process finishes.
Still, Windows 10 search is not working? Move on to the next solution!
Interesting Read: How to Make Files Undeletable in Windows 10
Resetting the Start Menu Search Function
When the start menu search is not working, you can simply reset it. Depending on your Windows version, this solution may take a short time or otherwise longer to execute.
First, you need to know what Windows version you are using on your device, using the following method:
- Open the Start menu, launch the Settings app, then select System.
- Scroll down the navigation items on the left and open About.
- Scroll to the section titled “Windows specifications”. Here you can see what version of the Windows 10 operating system currently runs on your device.
1809 and Former Versions
Follow these steps:
- Open Start, right-click on Cortana, expand to More, and click on the “App settings” option.
- When the settings launch, Find the Reset option and click on it.
1903 and Later Versions
If you installed the May 2019 Windows 10 Update and the next ones, you got the 1903 version. The Windows 10 Search bar reset requires the use of Windows PowerShell. Administrator permissions and a script download are necessary as well.
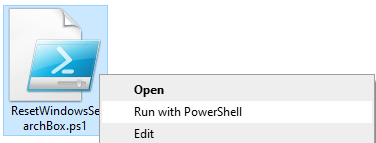
- Visit the Microsoft Download Center online to download the script titled “ResetWindowsSearchBox.ps1”.
- Open the location where you saved the file, right-click on the file, and select the option “Run with PowerShell”.
- Select Yes if prompted by the dialog “Do you want to allow this app to make changes to your device?”.
- The script execution takes place and resets the Windows Search bar. When “Done” appears in PowerShell, you can close the window.
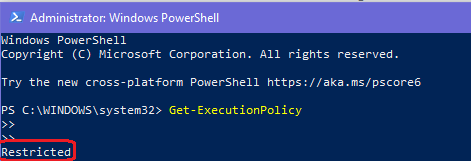
In case your script execution policy does not allow loading such scripts, you can try the following.
- First, check your execution policy using the following command in Windows PowerShell.
Get-ExecutionPolicy
- Tap Enter.
- If it is set to “Restricted”, you can change it to allow the script to run. Note down which policy was set – you must change it back afterward for security reasons. Here, we have the “Restricted” setting.
- Insert this command in the command line in Windows PowerShell next, and tap Enter:
Set-ExecutionPolicy -Scope CurrentUser -ExecutionPolicy Unrestricted
- Next, when the cautionary message appears, press Y for Yes, followed by tapping Enter so that your changes are saved.

- You will see “Done” appear when the script finishes running. Don’t close the PowerShell window just yet! Now, you should change your policy setting back to the original one.
- In Windows PowerShell, enter this command:
Set-ExecutionPolicy -Scope CurrentUser -ExecutionPolicy OriginalSetting
- Here, replace the text “OriginalSetting” with the execution policy setting you noted earlier e.g. Restricted. Press Enter.
- When the cautionary message appears, tap Y for Yes as before, and hit Enter to save the change and return to your original execution policy setting. You can close the Windows PowerShell window now.
Reboot the Windows Search service
Sometimes, results don’t appear when your search and Indexing settings are not accessible. In situations like these, Windows 10 search will not work probably because the Windows Search service is deactivated on your PC. Enable it with the following steps:
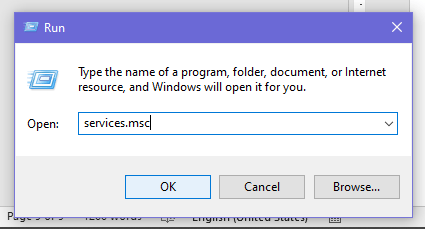
- Open Run by pressing the Windows logo key + R.
- Type “services.msc” and hit OK.
- Scroll down to find the Windows Search service and double-click on it to open a new dialog window.
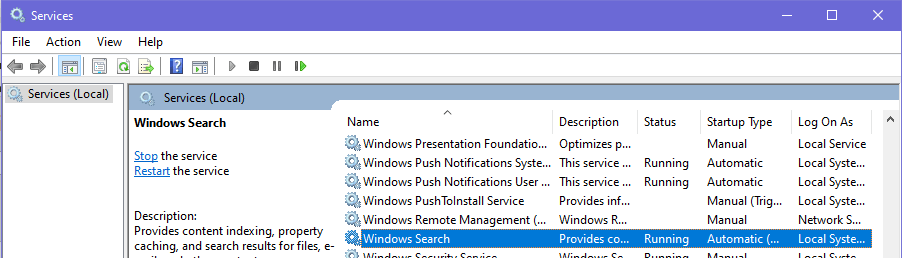
- In the General tab, open the drop-down menu named “Startup type”, and choose the option “the Automatic (Delayed Start)”.
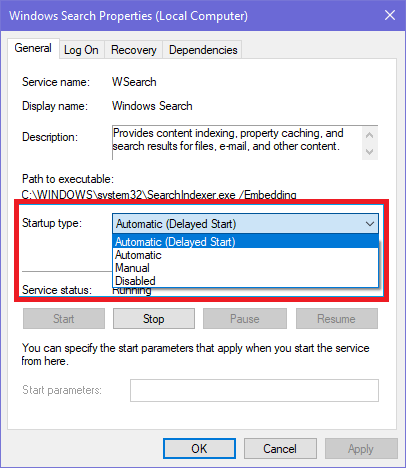
- If the service was disabled, you see an active “Start” button under the Service status text. Click it, followed by clicking on Apply and OK to save your changes.
- Now check and see whether your start menu search is working or not.
After reading this article, I hope you now have a better understanding that what to do if Windows 10 search is not working!
Note: Does this article provide the info you’re looking for? Is there any information you think of missing or incorrect? You can give your opinion in the comments section below.
If you like this tutorial, share this post and spread the knowledge by clicking on the social media options below because “Sharing is caring”
Sources:
- https://www.techradar.com/how-to/how-to-fix-search-problems-in-windows-10
- https://www.windowscentral.com/how-fix-taskbar-search-not-working-windows-10
- https://beebom.com/windows-10-search-not-working-how-to-fix/
- https://www.maketecheasier.com/fix-windows-10-start-menu-search/
- https://www.lifewire.com/fix-windows-10-search-4176188