Fix: Windows 10 camera is not working
It’s always annoying when something stops working. If your Windows 10 camera is not working, you have come to the right place! By reading this guide, you will be able to figure out why your webcam is not working in Windows 10 and what you should do about it.
You may want to check if your webcam physically appears fine – check for any exposed wires, incorrect placement, poorly-plugged in cables, or other damages.
Windows 10 Camera is Not Working: Possible Reasons
If your webcam is not working in Windows 10, the following scenarios are worth looking at. You can try plenty of fixes for webcam issues in Windows 10. The following reasons might be the culprit for this issue:
- External Webcam Not Detected
- A New Update Messed with the Software’s Functionality
- The Driver for the Webcam Did Not Function Properly
- Privacy Permissions Prevent the Camera from Functioning in an App
Fixes for Webcam Issues in Windows 10
1) Update the Laptop Camera Driver
If your windows 10 camera is not working, updating the laptop camera driver is the simplest fix. This can handle any software issue. Using the device manager, you can install or manage updates for your driver webcam problems in Windows 10. Your computer needs to have an internet connection for this.
Related: How To Free Up Disk Space On PC
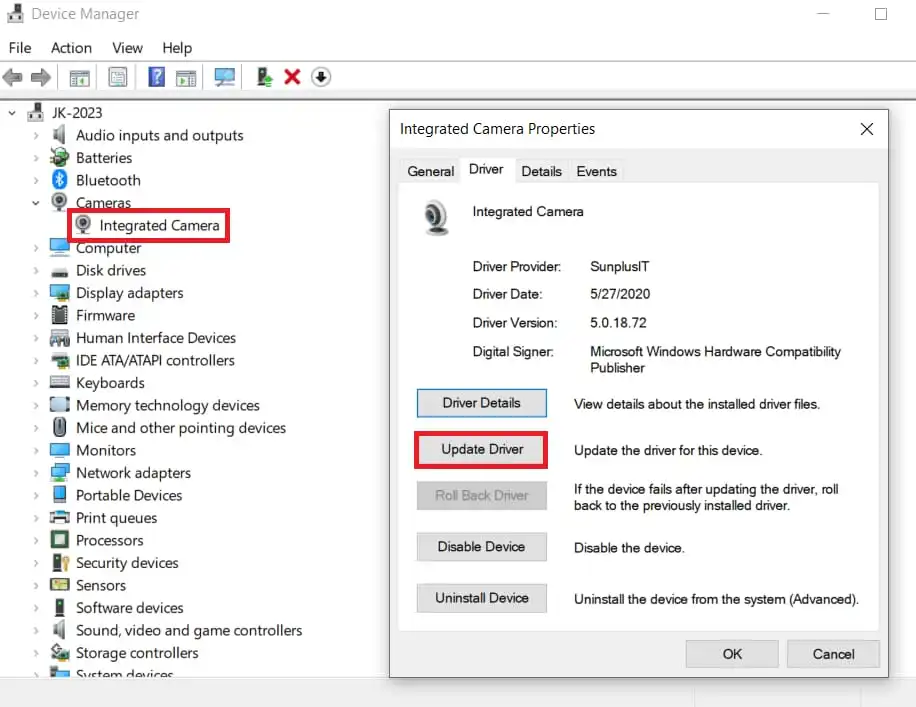
- Right-click on Start Menu, or press the Windows key + X and select Device Manager from the menu.
- Your camera appears under either Imaging devices; Sound, video, and game controllers; or Cameras. Click accordingly.
- When the menu expands, right-click on the name of the webcam that needs fixing.
- Select Update Driver software from the menu.
- The update wizard prompts you to select how to search for the driver. Choose the option “Search automatically for updated driver software.”
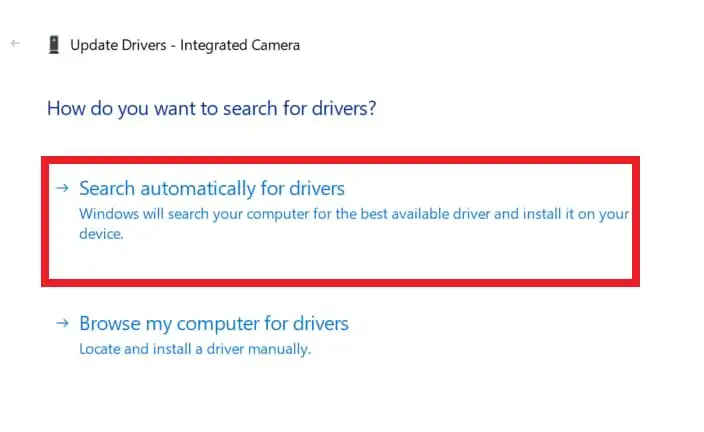
- Click on Next. You will have to wait for a little as the wizard searches for drivers. If it finds updates, the wizard prompts you to confirm their installation and downloads them. Reboot the computer afterward.
- If your webcam driver is already the most recent, the wizard informs you so.
- If still, your windows 10 camera is not working after installing driver updates, then try installing Windows updates. Navigate to Start > click on Settings > open Update & Security > click on Check for updates in Windows Update. Reboot your computer if necessary.
2) Roll Back Webcam Driver To the Previous Version
If the webcam is not working in windows 10 with the new driver version and if worked fine with previous driver versions, you can roll it back. You can also roll back the driver for webcams manufactured before Windows 7.
- Right-click on Start Menu, or tap on the Windows key + X > select Device Manager from the menu.
- Go to where your webcam appears in either Imaging devices; Sound, video, and game controllers; or Cameras.
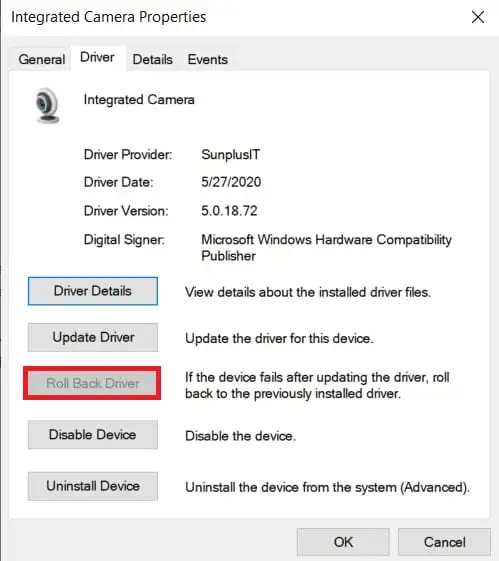
- Right-click on the name of your webcam, and choose Properties. In the properties, go to the “Driver” tab and click on “Driver details”. Search for a file named “stream.sys”. If you find it, your camera came from before Windows 7. You can either replace it or roll back the driver.
- Click on the option “Roll Back driver” in “Driver Details”. Select “Yes” on the prompt.
- When the rollback completes, restart your PC. Confirm whether your webcam works.
3) Using the Hardware Troubleshooting Wizard When Webcam is Not Working in Windows 10
Sometimes your webcam is not working in windows 10 due to hardware issues. Not to worry though – you can use the troubleshooter for Hardware and Devices for fixing the problem. This also ensures that the physical installation of the webcam was correct.
- Navigate to Control Panel.
- Click on the “View by” arrow at the upper right corner, and select the Large icons option to display all Control Panel items. Conversely, you can also search for “Troubleshooting” from the search menu on the top-right corner.
- Select Troubleshooting > click on Hardware and Devices, or Hardware and Sound.
- Click on the Next button, and follow the on-screen instruction for running the troubleshooter as it looks for issues to correct.
4) Uninstall/Reinstall Your Webcam
If your webcam is not working in Windows 10 after updates, try reinstalling the camera to fix your webcam problems in Windows 10.
- Right-click on the Start Menu button or press the Windows key + X > select Device Manager from the menu.
- Go to where your webcam appears in either Imaging devices; Sound, video, and game controllers; or Cameras.
- Right-click on your webcam name, and choose Uninstall from the menu.
- Go back to the Device Manager window > click Action (next to the File option) > choose “Scan for hardware changes”. The drivers install again automatically.
- Restart your PC afterward.
5) Using Compatibility Mode for Installing the Driver
If your Windows 10 camera is not working, the reason may be the wrong installation of the webcam driver, especially, if the driver is not installed using the compatibility mode.
For this, you need to download the correct version of the driver from the internet. You may find the driver for a built-in laptop webcam on the website for the laptop’s manufacturer.
For a separate plug-in webcam, use the webcam’s manufacturer and model specifications to locate the correct driver.
Related: Top 30 Most Useful Websites to Visit Daily
- Download and save the correct driver somewhere you can easily find it.
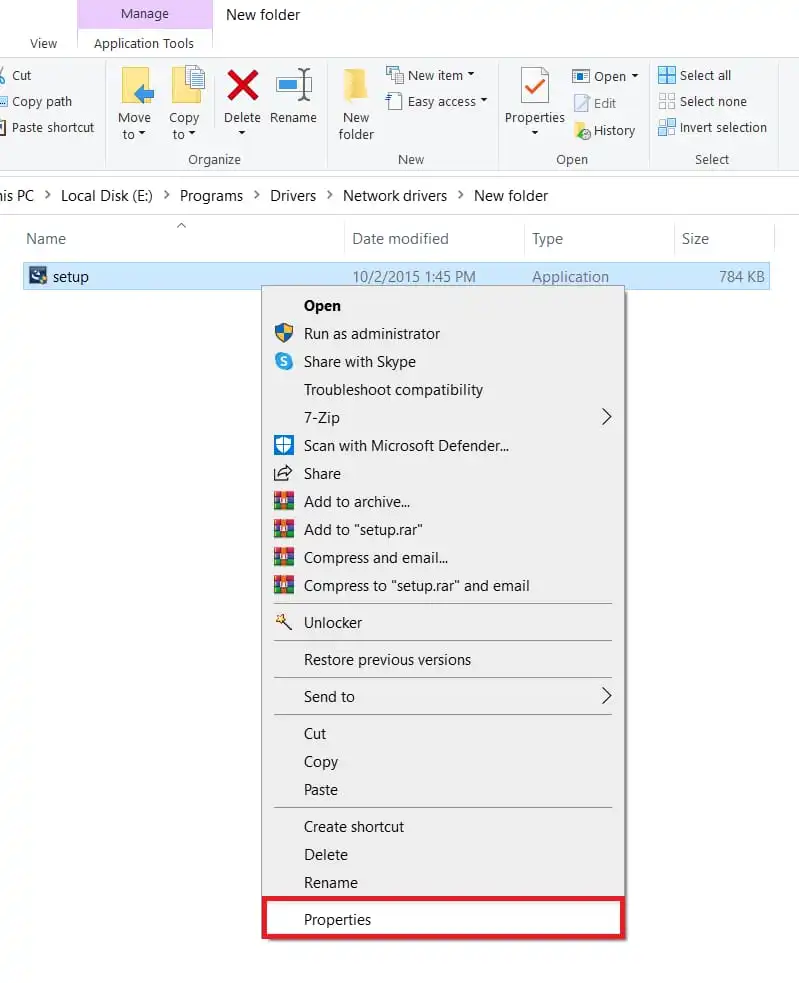
- Open File Explorer, locate the driver installation file, and right-click to open the menu.
- Select Properties > open the Compatibility tab.
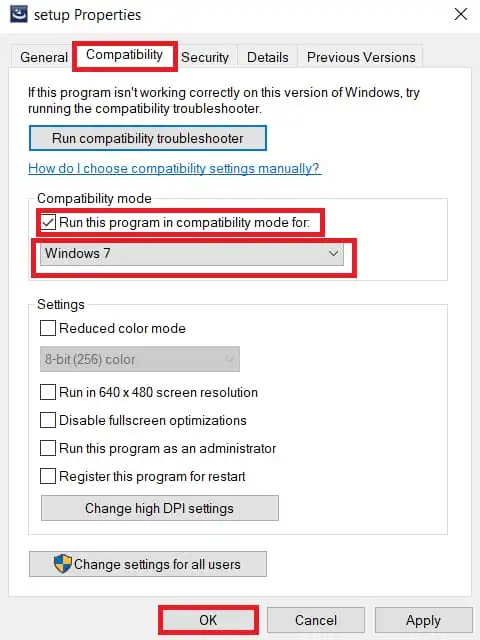
- Mark the option for “Run this program in Compatibility mode”, and select the operating system you want the compatibility of e.g. Windows 7 or Windows XP if it dates to that time.
- Apply the settings, click OK and launch the installer.
- Once the driver installs, reboot your PC, and check for any problems.
6) Check Camera Privacy Settings
Sometimes, privacy settings can be a reason for your windows 10 camera not working correctly. To find out if this is the case, do the following:
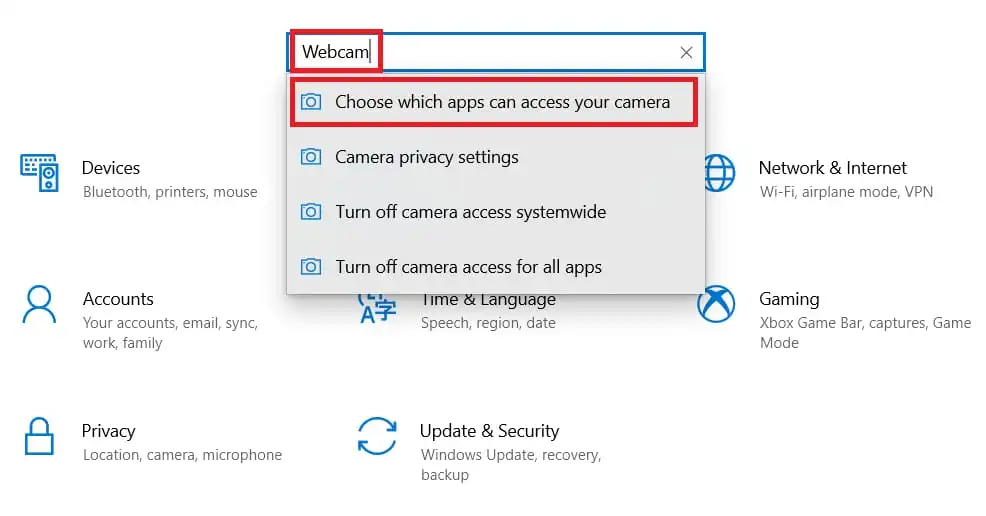
- Navigate to Start Menu > Settings.
- Enter “webcam” in the search box.
- For managing access of individual applications to the camera, tinker with the toggles in “Choose which apps can access your camera”, and other camera privacy settings.
- Try running your camera again. If the camera is still not working, check your antivirus settings. Some settings result in apps getting blocked from using your camera.
Note: Does this article provide the info you’re looking for? Is there any information you think of missing or incorrect? You can give your opinion in the comments section below.
If you like this tutorial, share this post and spread the knowledge by clicking on the social media options below because “Sharing is caring”
Sources:
- https://www.windowscentral.com/how-fix-common-camera-problems-windows-10
- https://www.fonepaw.com/windows/windows-10-camera-not-working.html
- https://helpdeskgeek.com/windows-10/windows-10-camera-not-working-6-ways-to-fix/
- https://winbuzzer.com/2021/04/13/windows-10-camera-not-working-here-are-7-ways-to-fix-it-xcxwbt/
- https://www.lifewire.com/fix-windows-10-webcam-not-working-4587256